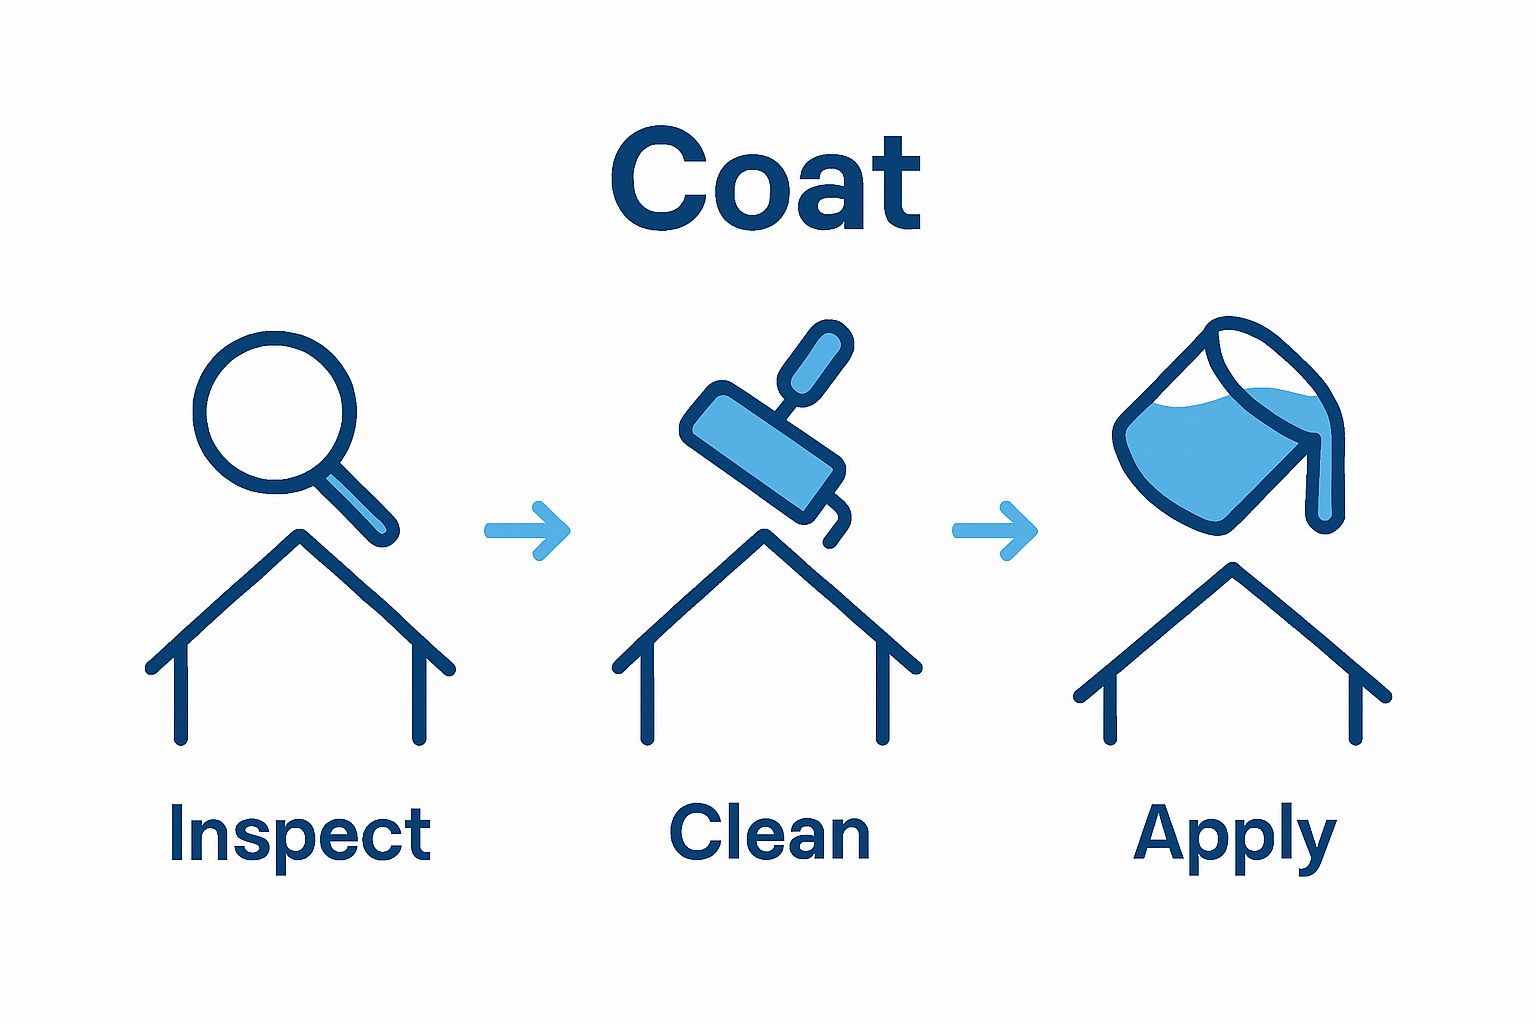
Waterproofing your roof might sound straightforward but even a hairline crack can turn into a costly repair if missed early on. Most people think a quick coat of sealant does the job. The real difference comes from a proper step-by-step workflow that starts with a meticulous inspection and ends with detailed quality checks. Miss one stage and you are risking hidden leaks and years off your roof’s lifespan.
Table of Contents
- Step 1: Inspect Your Roof for Damage
- Step 2: Prepare the Surface for Waterproofing
- Step 3: Choose the Right Waterproofing Material
- Step 4: Apply the Waterproof Coating Evenly
- Step 5: Allow Proper Curing and Testing
- Step 6: Conduct a Final Inspection for Quality Assurance
Quick Summary
| Key Point | Explanation |
|---|---|
| 1. Inspect for visible damage | Conduct a thorough visual assessment for cracks, discolouration, sagging, or missing materials to identify vulnerabilities. |
| 2. Properly prepare the roof surface | Clean the roof, allow complete drying, and repair any imperfections to ensure the best conditions for waterproofing. |
| 3. Choose compatible waterproofing materials | Select materials based on your roof type, environment, and manufacturer specifications to ensure effectiveness and durability. |
| 4. Apply coatings evenly in layers | Use the right method for the material and apply multiple thin layers, allowing drying time between each for optimal adhesion. |
| 5. Conduct a final inspection thoroughly | Verify the waterproofing’s effectiveness with visual checks, water resistance tests, and documentation for future reference. |
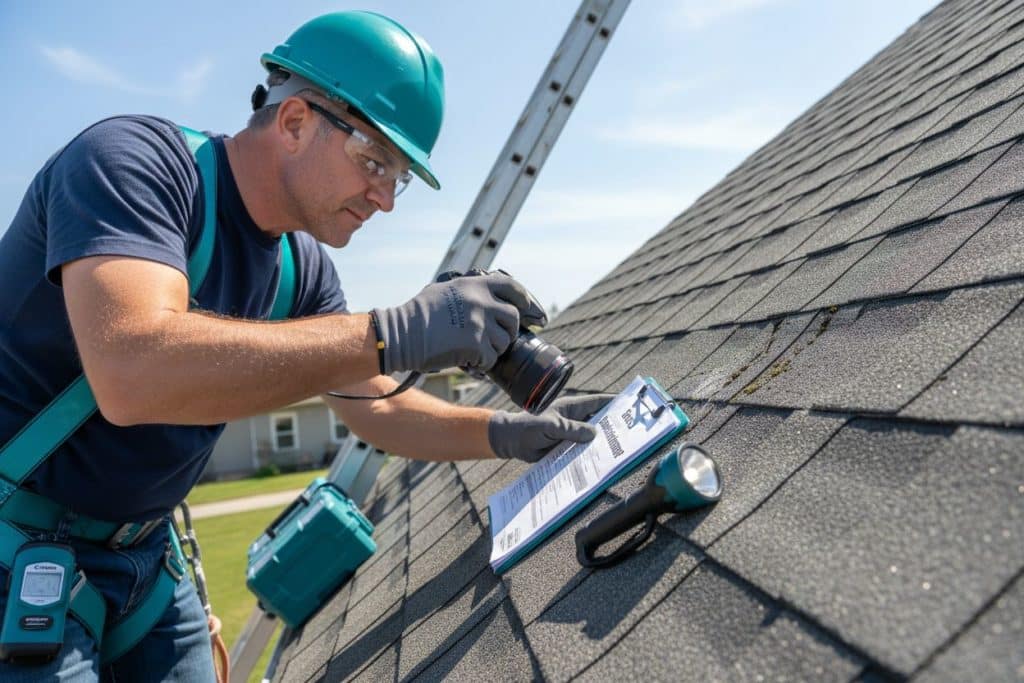
Step 1: Inspect Your Roof for Damage
Roof waterproofing begins with a comprehensive and systematic inspection that reveals potential vulnerabilities before they escalate into costly structural issues. The initial inspection stage is crucial for establishing a robust roof waterproofing workflow, allowing property owners to identify and address weaknesses proactively.
Begin your roof inspection by conducting a thorough visual assessment from both ground level and, where safely possible, from direct roof access. Look for clear indicators of potential water damage or structural compromise such as visible cracks, discoloured patches, sagging areas, or missing roofing materials. These signs often signal underlying issues that could compromise your waterproofing efforts if left unaddressed.
Comprehensive roof damage assessment requires careful observation and methodical examination. Start by surveying the roof’s external surface, checking each section systematically. Pay particular attention to potential problem areas like roof joints, edges, flashings, and areas around chimneys or skylights. These locations are frequently more susceptible to water penetration and require meticulous inspection.
Utilise appropriate safety equipment when conducting your roof inspection. A sturdy ladder, non-slip footwear, and potentially a safety harness are essential. If you are uncomfortable with heights or lack the necessary equipment, consider engaging a professional roof inspector who can provide a detailed assessment.
Documentation is key during this initial inspection phase. Photograph every area of concern, creating a visual record that will help track changes over time and provide evidence for potential repair or insurance claims. Measure and note the dimensions of any visible damage, creating a comprehensive overview of your roof’s current condition.
While conducting your inspection, look beyond surface-level damage. Check for subtle signs of water infiltration such as interior ceiling stains, peeling paint, or unexplained moisture marks. These internal indicators often reveal water issues that might not be immediately apparent from an external roof examination. Our guide on house roof condition provides additional insights into comprehensive roof assessment techniques.
Successful roof waterproofing workflow depends on thorough initial inspection. By meticulously examining your roof’s condition, you establish a critical foundation for subsequent waterproofing strategies that will protect your property from potential water damage.
Step 2: Prepare the Surface for Waterproofing
Surface preparation represents the critical foundation of an effective roof waterproofing workflow, transforming a potentially problematic surface into a receptive canvas for protective treatments. This meticulous stage determines the ultimate success of your waterproofing strategy, ensuring optimal adhesion and long term protection for your property.
Begin by thoroughly cleaning the roof surface, removing all debris, dust, loose materials, and potential contaminants that might compromise waterproofing application. Use professional grade cleaning equipment such as pressure washers with appropriate pressure settings to avoid damaging the underlying roofing material. Concrete and tile surfaces require different cleaning approaches compared to metal or wooden roof structures, so select your cleaning method carefully based on your specific roof composition.
Comprehensive roof waterproofing techniques emphasise the importance of complete surface drying after cleaning. Moisture trapped beneath waterproofing membranes can lead to significant structural complications. Allow sufficient time for the surface to dry completely – typically 24 to 48 hours depending on ambient temperature and humidity conditions. Use moisture meters where possible to verify absolute dryness before proceeding.
Inspect the cleaned surface meticulously for any structural irregularities such as hairline cracks, uneven areas, or minor surface damage. These imperfections must be addressed through targeted repairs using appropriate fillers, sealants, or repair compounds compatible with your specific roofing material.
Small defects can become significant water entry points if not properly remediated.
Prepare your workspace by gathering all necessary protective equipment, including respirators, gloves, safety glasses, and non-slip footwear.
This table outlines essential tools and equipment required for roof waterproofing, summarising their purpose to ensure safe and thorough completion of each workflow stage.
| Tool/Equipment | Purpose | Special Notes |
|---|---|---|
| Sturdy Ladder | Provides safe roof access | Use with non-slip footwear |
| Safety Harness | Prevents falls during roof inspection | Especially for steep roofs |
| Pressure Washer | Cleans debris and contaminants thoroughly | Adjust pressure for material |
| Moisture Meter | Verifies complete surface dryness | Ensures no trapped moisture |
| Roller/Brush/Spray | Applies waterproof coating evenly | Select method for surface type |
| Protective Gear | Safeguards against chemicals and dust | Includes gloves, respirator, goggles |
| Camera | Documents damage and process for records | Useful for insurance claims |
The final preparation stage involves selecting and testing your chosen waterproofing product for compatibility with your specific roof surface. Conduct small test applications in inconspicuous areas to verify proper adhesion, colour consistency, and performance characteristics. Roof waterproofing processes require careful product selection that matches your specific environmental conditions and roof substrate.
Successful surface preparation sets the stage for a robust waterproofing workflow, creating an ideal foundation for protecting your property against water infiltration and potential structural damage.
Step 3: Choose the Right Waterproofing Material
Selecting the appropriate waterproofing material forms the strategic core of your roof protection workflow, representing a critical decision that directly impacts the long term durability and performance of your roofing system. The right material acts as a protective shield, preventing water infiltration and preserving your property’s structural integrity.
Material selection depends on multiple crucial factors, including your specific roof substrate, local climate conditions, expected environmental stress, and budget constraints. Liquid applied membranes offer exceptional flexibility and seamless coverage, particularly effective for complex roof geometries with multiple joints and potential water entry points. Acrylic based solutions provide excellent UV resistance, while polyurethane membranes deliver superior durability and elongation capabilities.
Comprehensive roof waterproofing process recommends conducting a thorough assessment of your specific roofing requirements before material selection. Consider factors such as temperature fluctuations, potential chemical exposures, expected foot traffic, and anticipated movement within the roofing structure. Some materials perform exceptionally well in specific environments but may degrade rapidly under alternative conditions.
For concrete and masonry surfaces, cementitious waterproofing compounds offer remarkable moisture resistance and structural bonding. These materials create a rigid, integrated protective layer that becomes part of the underlying surface. Bituminous membranes provide excellent waterproofing for flat or low slope roofs, offering robust protection against water penetration and environmental degradation.
Evaluate each material’s technical specifications carefully, paying particular attention to elongation percentages, tensile strength, and chemical compatibility. Professional grade waterproofing materials should provide comprehensive documentation detailing performance characteristics, application guidelines, and expected longevity. Detailed waterproofing insights can help you understand the nuanced differences between available products.
Consider the long term maintenance requirements associated with different waterproofing materials. Some solutions demand periodic reapplication or specific maintenance protocols to maintain optimal performance. Factor these ongoing costs and effort into your initial material selection process, recognising that initial investment in high quality materials can significantly reduce future repair expenses.
Below is a comparison of common roof waterproofing materials discussed in the guide, illustrating their main properties and best use scenarios for easier selection.
| Material Type | Key Properties | Best For | Maintenance Needs |
|---|---|---|---|
| Liquid Applied Membrane | Seamless, flexible, covers complex shapes | Complex roofs with joints and entry points | Periodic inspection |
| Acrylic-based Solution | Excellent UV resistance, durable | Areas prone to direct sunlight | Occasional reapplication |
| Polyurethane Membrane | High durability, elongation | Roofs requiring robust flexibility | Professional care recommended |
| Cementitious Compound | Rigid, strong moisture barrier | Concrete and masonry substrates | Minimal, long lifespan |
| Bituminous Membrane | Solid, robust waterproofing | Flat or low slope roofs | Occasional monitoring |
Your material choice represents a critical investment in your property’s protection. By carefully evaluating technical specifications, environmental conditions, and performance characteristics, you can select a waterproofing solution that provides reliable, long lasting defence against water intrusion.
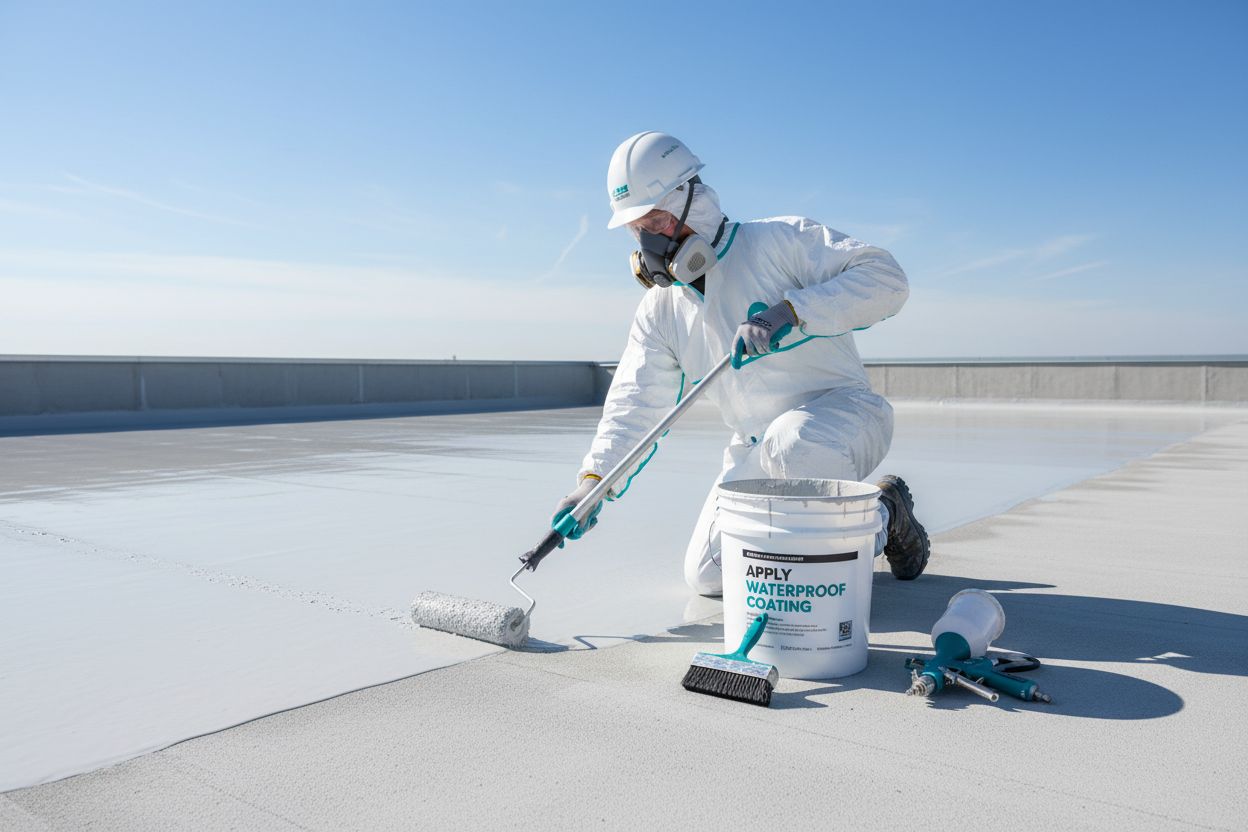
Step 4: Apply the Waterproof Coating Evenly
Applying the waterproof coating represents the pivotal moment in your roof waterproofing workflow, where precision and technique converge to create a robust protective barrier against moisture intrusion. This critical stage transforms your carefully prepared surface into a resilient shield that will defend your property against water damage.
Begin by selecting the most appropriate application method for your chosen waterproofing material. Roller, brush, and spray techniques each offer unique advantages depending on your specific roof surface and selected product. Spray applications provide exceptional coverage for large, uniform surfaces, while rollers and brushes allow more controlled application in complex or detailed areas.
Airless spray painting techniques can significantly enhance coating uniformity, ensuring complete surface coverage with minimal material waste. When using spray equipment, maintain a consistent distance from the surface – typically 30 to 40 centimetres – to achieve an even, uninterrupted layer.
Temperature and humidity play crucial roles in successful coating application. Most waterproofing materials perform optimally between 10 and 30 degrees Celsius, with moderate humidity levels. Avoid applying coatings during extreme weather conditions or when rain is anticipated within the next 24 to 48 hours. Direct sunlight can accelerate drying, potentially causing uneven application or premature setting.
Apply the waterproofing material in multiple thin, uniform layers rather than a single thick coat. This approach ensures better penetration, improved adhesion, and more consistent coverage. Allow each layer to partially dry before applying the subsequent coat, following the manufacturer’s specific guidance on recommended drying intervals.
Pay exceptional attention to critical areas prone to water infiltration, such as roof joints, edges, penetration points, and potential stress zones. These locations require extra material and careful application to prevent potential weak points in your waterproofing system. Comprehensive waterproofing solutions emphasise the importance of meticulous detailing during the application process.
Verify your coating’s effectiveness by conducting a visual inspection immediately after application. Look for consistent colour, smooth texture, and complete surface coverage. Any visible gaps, thin spots, or irregularities should be addressed immediately by applying additional material to create a seamless protective barrier.
The successful application of your waterproof coating transforms your roof into a resilient defence mechanism, protecting your property from potential water damage and extending the structural integrity of your roofing system.
Step 5: Allow Proper Curing and Testing
The curing and testing phase represents the critical validation stage of your roof waterproofing workflow, where patience and systematic verification transform your applied coating into a robust protective barrier. This crucial step ensures the long term effectiveness and reliability of your waterproofing investment.
Curing time varies significantly depending on the specific waterproofing material, environmental conditions, and manufacturer recommendations. Generally, most waterproofing membranes require a minimum of 24 to 48 hours for initial setting, with complete curing potentially taking up to seven days. During this period, protect the treated surface from direct rainfall, extreme temperatures, and mechanical stress.
Standardised waterproofing testing protocols emphasise the importance of monitoring environmental conditions during the curing process. Maintain consistent temperature and humidity levels to facilitate optimal membrane formation. Avoid walking on the freshly coated surface or allowing any unnecessary weight or movement that might compromise the developing protective layer.
Conduct a series of comprehensive tests to verify the waterproofing coating’s effectiveness. Begin with a visual inspection, looking for any signs of uneven coverage, bubbling, or potential imperfections. Use a moisture meter to assess the surface’s water resistance, checking for any potential penetration points or areas requiring additional treatment.
Simulate water exposure through controlled testing methods. Gently spray water across the treated surface, observing how the coating repels moisture and assessing its beading and runoff characteristics. Look for uniform water displacement and consistent protective performance across different roof sections.
Roof waterproofing solutions recommend creating a comprehensive documentation log during the testing phase. Record environmental conditions, application details, curing time, and test results. This documentation serves as a valuable reference for future maintenance and potential warranty claims.
Pay special attention to critical areas such as roof joints, edges, and penetration points. These locations are most susceptible to potential water infiltration and require meticulous verification. Use magnification tools if necessary to inspect these potentially vulnerable zones thoroughly.
The successful completion of the curing and testing phase transforms your waterproofing application from a mere coating to a reliable protective system. By investing time and attention in this critical stage, you ensure maximum longevity and performance of your roof’s water resistance capabilities.
Step 6: Conduct a Final Inspection for Quality Assurance
The final inspection represents the ultimate validation of your comprehensive roof waterproofing workflow, serving as a critical quality assurance checkpoint that confirms the effectiveness of your entire protection strategy. This meticulous examination transforms your technical efforts into a reliable, long lasting defence against water infiltration.
Comprehensive visual assessment forms the foundation of your final inspection. Examine the entire roof surface systematically, using both ground level and elevated perspectives. Look for subtle indicators of potential weakness such as microscopic hairline cracks, slight colour variations, or imperceptible surface irregularities that might compromise the waterproofing membrane’s integrity.
Detailed roof inspection techniques recommend employing multiple diagnostic tools to enhance your assessment accuracy. Utilize moisture meters to detect any hidden moisture penetration, thermal imaging cameras to identify potential thermal inconsistencies, and high resolution digital photography to document and compare surface conditions.
Conduct a comprehensive water resistance test by carefully simulating rainfall conditions. Use controlled water application techniques to assess how the waterproofing membrane performs under direct moisture exposure. Pay particular attention to critical areas such as roof joints, edges, and potential stress points where water infiltration is most likely to occur.
Evaluate the coating’s adhesion and flexibility by observing its response to subtle surface movements and temperature variations. Gently press different sections of the treated surface, checking for consistent resilience and examining how the membrane responds to mild mechanical stress. Any signs of premature cracking or separation warrant immediate remedial attention.
Waterproofing quality verification emphasises documenting every aspect of the final inspection. Create a comprehensive report detailing your findings, including photographic evidence, measurement readings, and any recommendations for potential future maintenance. This documentation serves as a valuable reference for long term property protection.
Consider engaging a professional waterproofing inspector for an independent third party assessment. Their expert perspective can provide additional insights and validate the effectiveness of your waterproofing workflow. Professional verification adds an extra layer of confidence in your roof’s protective capabilities.
The successful completion of this final inspection transforms your waterproofing project from a technical procedure into a robust, reliable protection system. By investing time and attention in this critical quality assurance stage, you ensure maximum defence against potential water damage.
Secure Lasting Roof Protection with Pro Waterproofing Expertise
Have you carefully followed every step of the roof waterproofing workflow but still feel uncertain about long-term results? Homeowners and property managers often face challenges such as hidden weak spots, inconsistent coatings, or the fear of costly water damage returning despite best efforts. The article highlighted issues like inspection accuracy, correct material selection, and the importance of thorough testing, all crucial for true peace of mind. If you want reliable, lasting protection rather than temporary fixes, our expert solutions offer the assurance you need. For more guidance, explore our Uncategorized – Pro Waterproofing resource for related insights.

Do not leave your property vulnerable to the risk of leaks or costly repairs. Choose professionals who specialise in every aspect of the roof waterproofing process. Visit Pro Waterproofing today to request a personalised quote or speak with an experienced specialist who can guide you from thorough inspection right through to quality assurance. Take control of your building’s future now and enjoy the confidence that comes with lasting protection.
Frequently Asked Questions
How can I thoroughly inspect my roof for waterproofing needs?
Begin by conducting a visual assessment from ground level and, if safe, from the roof. Look for visible cracks, discoloured patches, sagging areas, or missing materials, and document your findings with photos and measurements to track any changes over time.
What steps should I take to prepare my roof surface for waterproofing?
Thoroughly clean the roof surface to remove debris and contaminants, then ensure it is completely dry, typically within 24 to 48 hours. Inspect for any structural irregularities and repair minor damage using appropriate fillers to create a strong foundation for waterproofing.
What factors should I consider when choosing waterproofing materials for my roof?
Select waterproofing materials based on your roof substrate, local climate, and the specific environmental conditions it will face. Evaluate materials on their flexibility, durability, and maintenance requirements to make an informed choice that offers lasting protection.
How do I apply the waterproof coating evenly on my roof?
Choose an appropriate application method such as roller, brush, or spray, based on your roof surface. Apply multiple thin layers rather than one thick coat to ensure better adhesion and coverage, allowing each layer to dry partially before adding the next.
How can I test the effectiveness of my waterproofing coating after application?
Conduct a visual inspection for even coverage and use a moisture meter to check for potential penetration points. Simulate rainfall conditions by gently spraying water on the surface and observe how well the coating repels moisture, particularly at critical areas like joints and edges.
What are the key aspects to check during the final waterproofing inspection?
Perform a comprehensive visual assessment of the entire roof surface and check for any signs of cracking or imperfections. Test the adhesion and flexibility of the coating by gently pressing on different areas, and document your findings thoroughly for future reference.